Quick Reference Guide (QRG) #14
Last updated12 September 2023
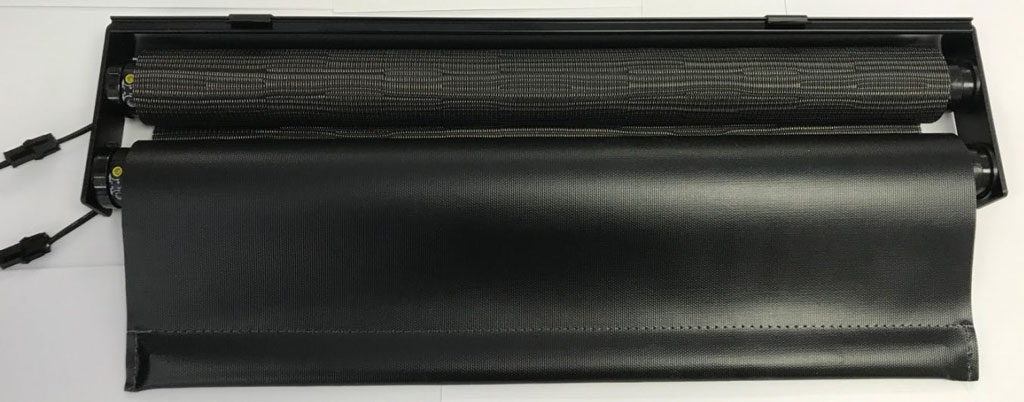
Shade Replacement - Motorized DRS House Shade (with Standard Motor 4280 and 4280P):
This manual will guide you through the process of replacing a motorized DRS (Double Roller) shade in your living quarters. In here we explain how to remove and replace the whole shade assembly. If you need instructions on how to replace the motor inside the shade only, refer to QRG #16.
For instruction on how to access the shade assembly behind the valence, contact your coach manufacturer. You have the option to remove the whole shade assembly as explained in this guide, or to remove only one single roller of the shade while the railing assembly remains in place, as explained in QRG #16.
In here we explain how to remove the whole shade assembly.
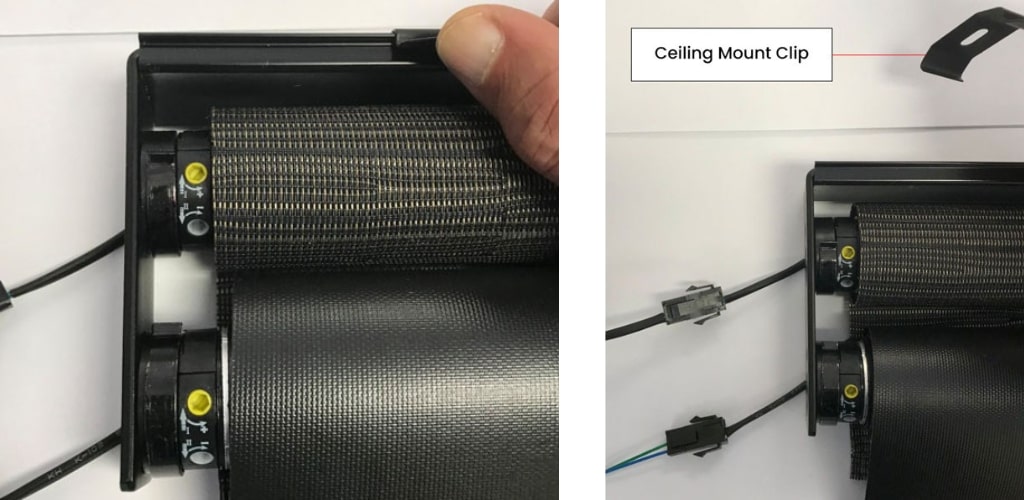
- Disconnect the wire cables of the shades from the vehicle wiring
- Before you remove the shade, you need to disconnect the power cable of the shade from the coach. Do NOT cut the wires. On 2nd generation of motors (4280P), there is a small black Molex connector, which you can use to disconnect. You just need to press the lug on the Molex connector and pull to separate. See the following images:

-
- On 1st generation motors (4280), there are no such Molex connectors. Even so, you must not cut the power wires, but disconnect them! The power cable from the shade is usually bundled with a tie-wrap and tucked into a hole on the top left corner of the shade. Pull this wire bundle out, remove the tie around the bundle and disconnect the cable from the coach wiring.
- Important: If you cut the motor wires, you void the warranty of your shade motor!
- Removing the Shade Assembly
- Now that you have disconnected the shade wires from the coach wiring, you can remove the entire shade assembly from the ceilinig. Please note that your shade could have been mounted 3 different ways, depending on your vehicle situation as shown below.
- Click-Ease Mounting Clips
- The shade is installed to the ceiling by a springclips that hold the mounting rail in place, as you can see in the following pictures. While holding the shade assembly, push the tabs on the front of the spring clips upwards, which will release the mounting rail. Release the clips one by one to release the mounting rail with the shade assembly.
-
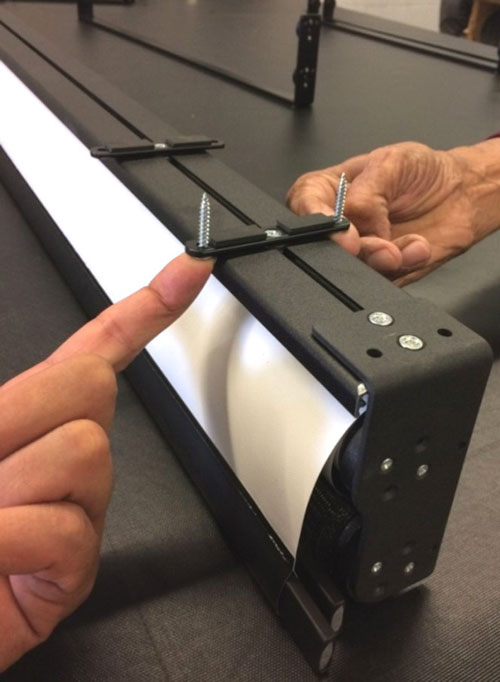
- Angle-Bracket (side) Mount
- As shown in the following picture, the shade assembly may also be installed to the ceiling by screws through an angle-brackets on each side of the shade. While firmly holding the shade assembly, remove the two screws on each side of the shade.

- Angle-Bracket (side) Mount
-
- Ceiling Bracket (top) Mounting
- This type of ceiling mount with a heavy-duty mounting rail is the same as used for large, heavy windshield shades. Please refer to QRG #15-1 (shades with 1st generation 4280 motor) or QRG #15-2 (shades with 2nd generation 4280P motor).
- Ceiling Bracket (top) Mounting
- Re-installing the Shade Assembly
- To re-install the shade assembly, follow above instructions in reverse order, making sure that all the screws are well tightened and the mounting clips (2.1) have fully snapped onto the mounting rail.
- Adjusting the Limit Positions
- After re-installation of the shade assembly, carefully run the shade up and down to check the limit position; if they need adjustment, refer to QRG #2 to set the limits.
If you would like to only replace a motor and keep the existing shade, please refer to QRG #16 (for 4280 and 4280P motors)