Quick Reference Guide (QRG) #1
Last updated13 June 2023
Shade is no longer working, or working intermittently:
How to determine whether it is indeed a shade problem or the result of a bad wire connection in the vehicle:
You need to isolate the problem to determine whether it is indeed a shade problem or whether it stems from an intermittent bad wiring in your vehicle (or a bad dash switch). If a wire in the vehicle wiring is stripped or pinched by some sharp edges of the metal chassis, you will notice a strange intermittent behaviour by the shade. The following test shows you how you can find out in few minutes what the real cause of your shade problem is in order to prevent a situation where you order a replacement shade, only to realize that your problems persist. First determine what motor types are in your shades then follow the instructions below:
Motors with Mechanical Limits (2-wire motors)
(1st Generation #4280 and 2nd Generation #4280P)Disconnect motor wires and connect them directly to a 12VDC power source like a battery or a 12VDC adapter (see also note below). The shade should move smoothly in one direction. If you swap the wires to reverse polarity, the shade should now move smoothly in the opposite direction. If the shade operates properly, the problem stems from a faulty vehicle wiring. However, if the problem still persists it is indeed an issue with the motor, but it could also originate from the limit adjustment: try and turn both limit adjustment screws at least 6 full turns counter-clockwise. Try the above test again to see whether the shade now works in both directions. If still not working, replace motor(s).
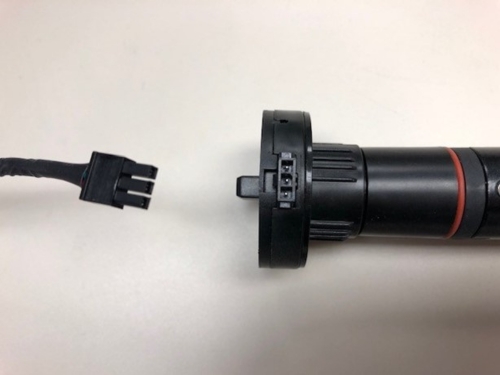
Note: If your shade motor is equipped with a 3” long pigtail wire with a female Molex connector (Illustration #1), you may either leave it connected to its male counterpart and disconnect the power wires further away, or disconnect the Molex connectors and request a separate 6’ long power cable with a male Molex connector attached (Illustration #2) from your dealer or from Auto-Motion Shade to do your testing.
2nd Generation Ignition-lock Motor #4270P (3 wire-motor):
-
Disconnect all 3 motor wires and leave the red wire disconnected; then connect green and blue wires directly to a 12VDC power source like a battery or a 12VDC adapter. The shade should move smoothly in one direction. If you swap the wires to reverse polarity, the shade should now move smoothly in the other direction. If the shade operates properly, the problem stems from a faulty vehicle wiring. However, if the problem still persists it is indeed an issue with the motor. Now connect the programmer and re-program the limits (QRG 7-2, Programming Limits of 2nd Generation Ignition Lock Motor 4275P). Then try above test again. If still not working, replace motor(s).
-
Note: Your shade motor is equipped with an integrated Molex receptacle where the power cable from the vehicle is connected to (Illustration #3). You may either leave the power cable connected to the motor and disconnect the power wires further away, or disconnect the power cable at the motor and request a separate 6’ long power cable with a male Molex connector attached (Illustration #2) from your dealer or from Auto-Motion Shade to do your testing.
1st Generation Ignition-lock Motor #4270 (5-wire motor):
-
Disconnect all 5 power wires and leave the red wire disconnected; then connect the solid black to positive (+) of battery (or a 12VDC adapter) and black wire with white stripe to negative (-) of battery. Now connect the green and blue wires to the battery (one to positive, the other one to negative). The shade should move smoothly in one direction. If you swap the green and blue wires to reverse polarity, the shade should now move smoothly in the opposite direction. If the shade operates properly, the problem stems from a faulty vehicle wiring. However, if the problem still persists it is indeed an issue with the motor. Now try re-programming the motor limits, by following instructions in QRG 7-1 “Programming Limits of 1st Generation Ignition Lock Motor 4270”. If still not working, replace motor(s).
Illustration #1

Illustration #2
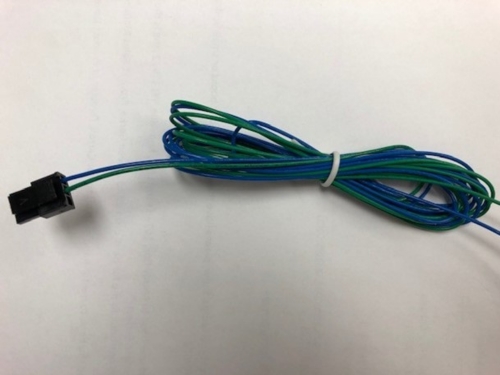
Illustration #3